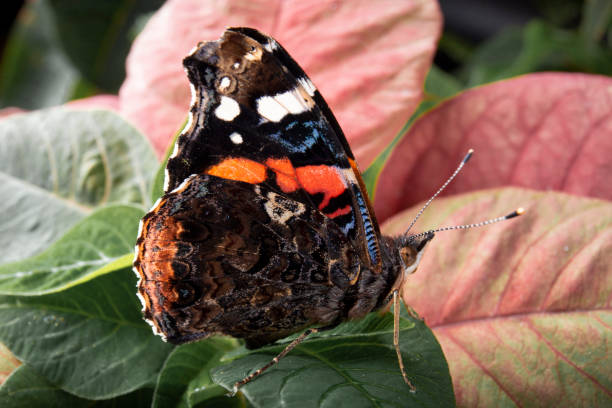
Are you an insect collector and wondering how you can preserve your dead moths for display purposes? In this article, we’ll share a guide on how to preserve a moth to help keep your dead insects in memory.
You can use many methods to preserve moths, and we have outlined most of them in this article. You can also use the same methods to preserve your dead butterfly, as butterflies and moths come from the same family. So, without wasting time, let’s get into the guide.
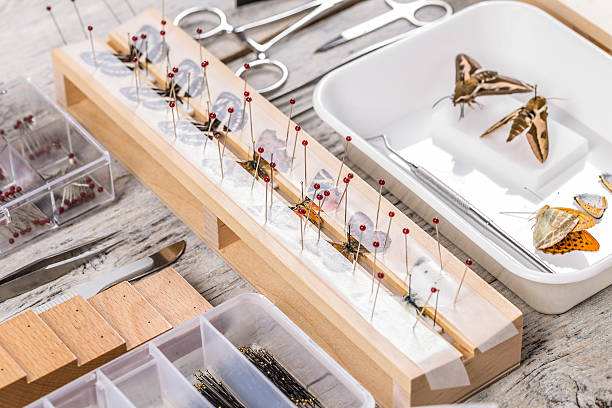
Materials You Will Need
- An air-tight sealed container
- Rubbing alcohol
- Insect spreading board: If you use the board method, you will need a wood board and styrofoam. The styrofoam ones are affordable and easy o get.
- Insect pinning forceps make handling of moths easier since moths are fragile.
- Insect pins: A size #2 will be best for pinning moths.
- Wax paper is cut into narrow strips to hold the wings n place.
- Display box: you can use a foam box or any box or custom makes any of your choices.
1. Collect The Moth You Want To Preserve
Let’s say you want to preserve a moth for aesthetic purposes; you are not supposed to walk around nature killing the moths. So it would be best if you used an already dead moth. If you do not find a dead moth, you can visit any insect collector’s shop and get a caterpillar.
You will nature the caterpillar into a moth and wait for it to die naturally before preserving it. Then, after it dies, put it into mothballs before deciding on the method you want to preserve.
2. Relax The Butterfly
You can skip this procedure if you have freshly collected your moths and their wings are flexible. However, if you collected them long ago and their wings are dry and brittle, you will have to relax them before you start the preservation process.
You will have to rehydrate them by creating a relaxing chamber using an air-tight sealed container and paper towels. Alternatively, stick the moth into the freezer to keep it fresh and moistened, then dust off using a hairspray.
If you put it in a jar, you need to add some rubbing alcohol to the paper towels. The moist paper towels prevent the growth of molds. You can squeeze out the excess liquid and ensure the paper towel is damp, not wet, then place a single layer of the paper towel at the bottom of your jar.
Now place your mouth on top of the layer. To avoid sticking the moth directly to a paper towel, you can put a mesh screen underneath for easy extraction time. Next, create a dome over the moth using a mesh screen, then add another damp paper towel on top.
Close the lid tightly and let it sit for the next 24-48 hours. The moisture released by the damp paper towels will create enough humidity inside the air-tight container to rehydrate the moth and allow its limbs to be more flexible.
It would be best if you make a 24-hour checkup on your dried insects to confirm whether they are pliable enough for the mounting process. Then, if you can easily move the antennae and wings, you can transfer the moth or butterfly’s body for preservation.
3. Use Pins To Mount Your Moth
You need to know how to use pins to mount these hard-bodied insects, or you may disintegrate them. You can use your fingers to hold the moth by its thorax, then gently squeeze the thorax. By doing so, the wings will separate gently. Next, insert a pin on the center of the thorax starting from the top of the moth’s body at a 90-degree angle.
If you are a beginner in this process, you will need a guide on how to pin insects, but if you are a pro, that will be unnecessary. However, it would be best to be careful while handling the moth’s wings as any mistake can accidentally rub off some scales and loos the beauty.
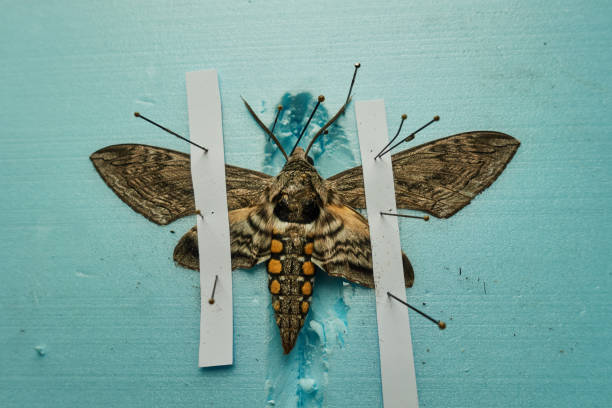
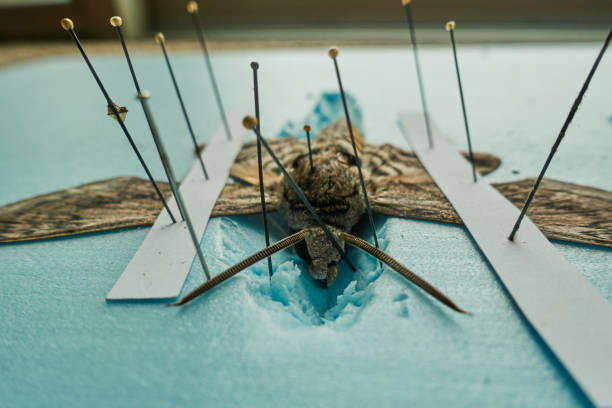
4. Mount The Moth’s Wings For Display
At this point, you will need to set the moth into place for display. Use the pin stuck on the thorax at the center of the board’s groove. Push it down into the foam unit at the bottom of your specimen’s wings and the board’s sides.
Cut some paper strips lined with wax, depending on the size of the moth, and paste them on either side of the moth’s wings. The paper strips will keep the wings spread so that they dry. Next, take your forceps and gently press on the wings as you put a narrow strip on each side to hold the wings firmly on the board. Place a pin on the bottom of either side but do not touch the wings.
5. Position The Forewings
Move the forewings into place by pushing them up. You can grab the vein with the forced tip, then gently pull it up.
Place another paper strip lined with wax under the forewing, then insert a pin above and below the wing. Ensure you have pinned the wing diagonally and not through it. Repeat the same procedure for the hindwings.
6. Position The Hindwings

Do the same process on the moth’s hind wing and the other side. However, you will have to use the vein at the bottom of the wing to pin the hindwing to place.
Take a paper strip and place it diagonally across each hindwing to hold the wings into place. If the thorax and the antennae block the place, you can pave the way for the wings by adjusting them sideways. If the abdomen is not in place, you can prop two pins crossed to each other.
7. Pin The Antennae
The last procedure includes pinning the antennae, often done in a v-shape. Once you’re done with the whole process, let your wooden board sit for 2-3 days to enable the moth to dry fully and remain intact in the position you put it.
You can now position the forewings. Confirm after every 24 hours that it is fully dried, then display your moth. There are several methods to display your moth; we have outlined a few below.
Types of Display Methods
1. In a Specimen Drawer
A specimen drawer includes a large wooden display that has styrofoam inside but is covered in glass. It is a great aesthetic investment for people who want to display moths.
2. In a Jar, Glass Dome, Double-Glass Frame, or Vial
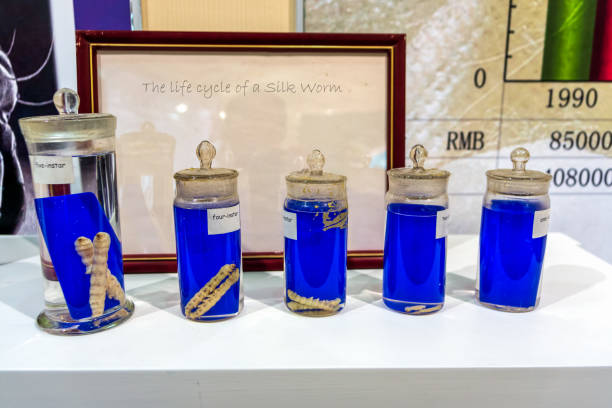
This display method is simple yet affordable. You only need to make sure you are using a large jar if you will preserve a lot of moths. You will also need to use a preservative fluid such as alcohol to increase the vial.
If you use the glass dome, you must glue the moth onto a stem or piece of wood, then arrange it alongside other dried materials. You will then glue the glass dome onto the clear silicone or epoxy glue base.
If you use the double glass frame, you can use the clear silicone glue to attach the moth to the glass or pins to attach the moth to a piece of cork that you will transfer onto the glass.
3. In Wrecker Mount
You can get a wrecker to mount in any craft store. A wrecker mount is ideal for displaying moths in a frame with cotton wool backing, side-opening pins, and a glass cover. This choice is affordable and keeps the moth in place without using pins.
4. In A Shadowbox
You can also use a shadow box to display your moths in a frame. You can get it at any craft shop or retail store. This type of display does not require pinning; you will need a glue stick or glue.
Alternatively, you can also improvise by using a storage box such as a cabinet, cigar box, or Cornell drawer with styrofoam and barking.
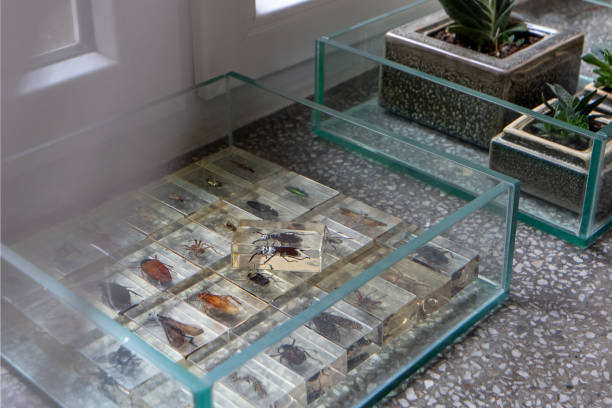
5. In Resin

You will need a clear casting resin, rubber molds, and a silicone mat. The resin cure will come with a hardener to set it. Since the hardener is toxic, you will need disposable gloves to set the resin.
Pros mostly use this method since it requires experimentation before practice. You will have to center the moth remove air bubbles, and cure the resin. Use rubber molds that are one or two inches larger than the moth’s wingspan.
Ensure you properly mix the resin and the catalyst. Then pour a thin base layer onto the mold. You can use forceps to submerge the moth into the resin. Leave the resin to dry for about 20 minutes to allow the gel to semi-dry so that the moth can be seen moving.
Add another layer of resin or two to keep the moth intact. Leave the resin untouched for 3 days to allow it to cure fully, then pop it out of the mold near a space heater. Once it has finished curing, you can sand or coat it with a clear plastic spray once it has finished curing.