So you want to preserve your turkey feet? That’s not a bad idea, but you require some expert skills to do it correctly. You must master how to preserve turkey feet for decorative purposes – and maybe for the local craft market.
This guide will teach you how to preserve turkey feet with a view to making you a perfect taxidermist. A well-preserved turkey foot should last for over five years and should qualify for display in your home and in craft shops.
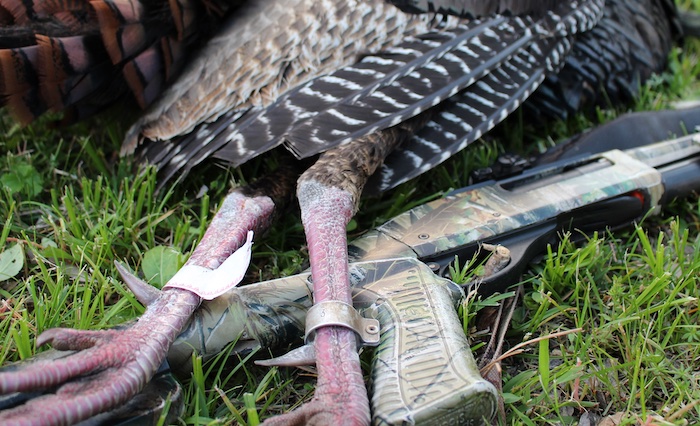
Your preserved turkey feet should still have the scales and spurs intact. These will make them suitable for public display and add credibility to them as well as demonstrate your expertise with curing turkey feet.
While many people would preserve turkey feet and store them as keepsakes, others would sell them and make good money in the process. Luckily, turkeys are not rare to come by and you do not necessarily have to go hunting to shoot them.
Tools you need to preserve turkey feet
- Small hand saw
- Sharp knife
- Borax powder
- Non-iodized salt
- Small nails or tacks
- Cardboard box
- Twine strings
- Weights
When you have these supplies handy, you can proceed to initiate the preservation process for your turkey feet.
How to preserve turkey feet: The steps involved
Cut and fasten your turkey feet
Preserving your turkey feet starts with cutting off the feet with a small hand saw. It is best to cut off the two feet of the big bird even though you might actually need only one – so one will serve as backup for the other. You must cut or saw at the knee of the bird where the scaly leg joins the thigh and well above the spurs.
After cutting off the turkey legs, place them in a walking position inside the cardboard box and then use the twine cord to fasten them to the sides of the box. You will do this by making two small holes in the cardbox and then inserting the two ends of the cord through them. You will place one turkey leg in the small hole made by the cord on the opposite side of the board before fastening the ends of the cord together to fasten the turkey leg to the board.
Salt and dry the turkey feet
Once your turkey feet is well secured in a standing or walking position to the box with a tight cord, apply salt liberally on the exposed part of the leg where you severed it with a saw. A non-iodized salt should be used if possible for this curing process. Apply as much salt as you can on the exposed part of the leg at its knee and then leave to dry for 2-3 weeks in the box.
Salting and drying your turkey feet will ensure that water or moisture is completely dried from the preserved body part. You could check on the leg a few times in the week to see how the drying process is progressing. If you observe that the salt is wet at the open section of the leg, remove it and replace with a fresh salt. After 2-3 weeks, the leg should be completely dry with the scales intact.
But if you find that the scales are falling off, then it means that the legs were dried in a humid environment instead of a dry and well-ventilated place.
Preserve the leg with borax
If you are not keen on using salt to dry your turkey leg, you can opt for borax powder. Just as described above, apply borax generously on the exposed part of the leg where it was severed and allow to dry for 2-3 weeks. Ensure that the legs are positioned in an upright position by tying it up to the cardboard box with a cord.
You can also use the tacks or small nails to keep it in position without piercing through the leg. You can use these to keep the legs fixed to a box or flat wooden board in a way to keep the leg straight and the toes spread out flat. It must be noted that the toes should be straight and not flexible after the stipulated period of 2-3 weeks; if they are flexible or bendable, it indicates that they are not thoroughly dry and should be tacked back into position for another one week until it is completely dry and straight.
Display your dried turkey feet
Once the turkey feet is completely dry, you can take it out of the cardboard stand and mount it in a play where it will be conspicously displayed. It will be able to stand on its own without any brace to support it; and you can also choose to mount it on a wooden stand designed specially for the purpose.
To add more sheen to your turkey feet, you can spray them with an Acrylic paint to give more depth of color and shine. The spray will also preserve the turkey feet for longer years while enhancing its natural color. It will add more value to the keepsake and make it more marketable in the local craft market. It is however you choice to decide if you want to spray the feet or not since some taxidermists prefer to leave the feet natural without any preservatives.
So there you have a detailed guide on how to preserve turkey feet – the cutting, salting, drying, and mounting processes. Try your hands at it to see how it works for you. It must be noted that the same process can be applied to preserving a chicken feet – and you can choose to try out the preservation techniques with a chicken feet before graduating to a turkey feet if you are still a newbie at this.
Ultimately, you will master the craft to the point of developing your own techniques; and these include using chemical preservatives to cure and store your turkey feet for many years. You may choose to leave your feedback in our comments section and be kind enough to include pictures for credibility.