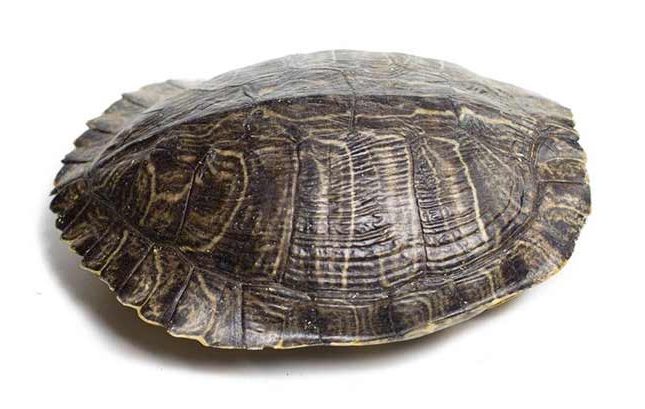
Turtles are fascinating aquatic creatures with hard shells and flipper-like limbs for swimming. These shells protect them from predators. Turtles are found almost everywhere in the world and live in both salt and fresh water, and people are always eager to know how to preserve a turtle shell.
You might be curious to know why anyone would want to collect the shells of turtles or even preserve them. Throughout history, the shells of turtles have been widely used in crafting decorative art pieces and jewelry.
The shells of some turtle species can be an interesting ornamental piece, which makes them very valuable in the antique market niche. Their uses also extend to religion, with many cultures of the world utilizing these shells for divination and local medicine.
You might find it surprising, but turtle shells are widely in demand in places like China where they are used to create a delicacy known as the turtle shell soup. The jelly flesh that sticks to the edges of the shell adds flavor and nutrients to this soup.
With the above in mind, many people want to know how to preserve turtle shells. There’s little variety to the process, which we would be explaining in detail in this article.
Basic materials for preserving a turtle’s shell
- Pressure washer
- Hammer
- Pick-axe
- Knife
- Borax
- Kitchen pot
- Rubber gloves
- Varnish or polyurethane
How to Preserve a Turtle’s Shell: The Steps Involved
Having set forward the materials needed to preserve a turtle’s shell, let us examine the step-by-step procedure for getting the process completed.
Remove the turtle from its shell
There are several ways to remove a turtle from its shell after it is dead. You can leave the shell on an ant-bed for a week or two, allowing ants and other insects to do the job. These insects will eat up the turtle’s soft tissue, helping you to hasten the process. After the smell from the decomposed tissues is gone, remove the turtle shell from the ant-bed and clean it up.
Another way of removing your turtle from its shell is by burying it. You can leave the turtle in an open space or bury it in a moist area. Leave the shell at this spot for a week or two before checking on it. The entire decomposition can take up to a month. So, you need to constantly check up on your turtle shell. Once the soft tissue is decomposed and its smell gone, move on to clean the shell.
Another approach to removing your turtle from its shell would be scrubbing it out yourself. This process is not for the faint-hearted as it can get gory. However, if you can’t do it yourself, seek the services of a professional to help you out. Once you’ve got the turtle out of its shell, leave it out in the sun for 1-2 days before you prepare the shell for preservation.
The last method of removing the turtle from its shell is by cooking the turtle. It seems unusual but it actually works. The cooking helps the soft tissue to come apart even faster. Get a large pot or deep pan for this method. Simmer the turtle and allow it to cook for some time. However, be prepared to withstand the foul odor that comes from the cooking. Only resort to this step if you have no time to waste and want to fast-track the entire removal process.
Some people use acidic solutions or other dangerous chemicals to melt the turtle’s soft tissue. This approach is not advisable unless you are an experienced professional. So, it’s recommended that you stick with the methods we’ve outlined above.
Clean the inside of the shell
After harvesting a turtle’s flesh, the next step is to thoroughly clean up the shell. The shells of turtles can be pretty tough to clean. The meat of the turtles is sure to stick to the shells after their removal – something you don’t want to see. The easiest way to clean the shell is to use a pressure washer. An orbital tip or a turbo-tip pressure washer works best for this process. You can order one from your local store if you don’t own one already.
Use the pressure washer to get into every crevice of the shell as well as along the spine. Continue this process until you get to the point where there is almost no trace of meat left in the shell. You should also pressure-wash the back of the shell. They come with a lot of moss and algae and different organisms growing on them. You can add a bit of bleach to help in quick removal. It can be quite a messy and tedious process but necessary to get your shell ready for the next step.
After cleaning with a pressure washer, sprinkle a generous amount of borax inside the shell and allow it to stay for up to 24 hours.
Coat your turtle shell with varnish or polyurethane
This is the most important step for preserving your turtle shell, and the process can be time-consuming – coating your shell with varnish or polyurethane. Coating your shell with varnish or polyurethane gives it a shiny and attractive appearance. For this, you need a fast-drying polyurethane spray.
There are a couple of things to keep in mind before you start spraying your shell. First, the spraying must be done in a well-ventilated area. It’s best if you work outdoors. Second, your shell must be clean and dry with no grit on them.
Prepare your work area. Get a trash bag and cut the side and bottom of the bag to place your shell. Shake the spray can for about a minute before spraying. Pause between sprays and shake a little so that it doesn’t settle. Apply an initial thin coat on your shell. Keep the spray can about 10-12 inches away while spraying. Try to reach all angles of your shell.
Wait for about 30 minutes before applying the second coat. You will require about three coats before your shell can achieve that nice and bright appearance. After spraying, leave your shell outside for up to 72 hours to dry completely. You have now mastered how to preserve a turtle shell, and the shell can now be used for craft or sold to potential customers.